Simple End Table in a Weekend

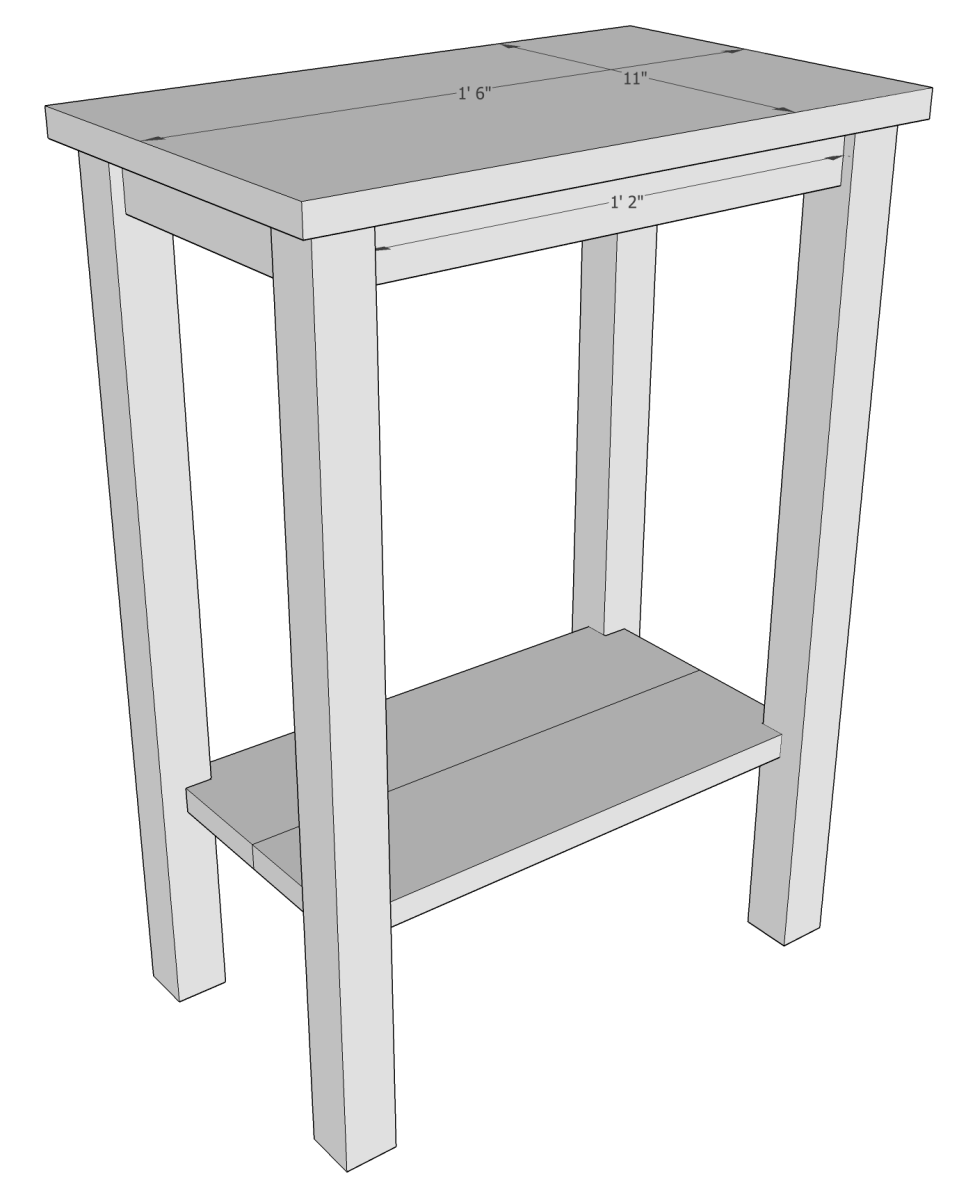
This weekend I put together this end table. It is 2 feet high and measures 11″ by 18″. The wood cost around $10 from Home Depot and it only took a few hours to build. I needed something narrow but still useful to go in our bathroom. I think this worked out perfectly, and after staining it black, it looks just like what you get from IKEA.
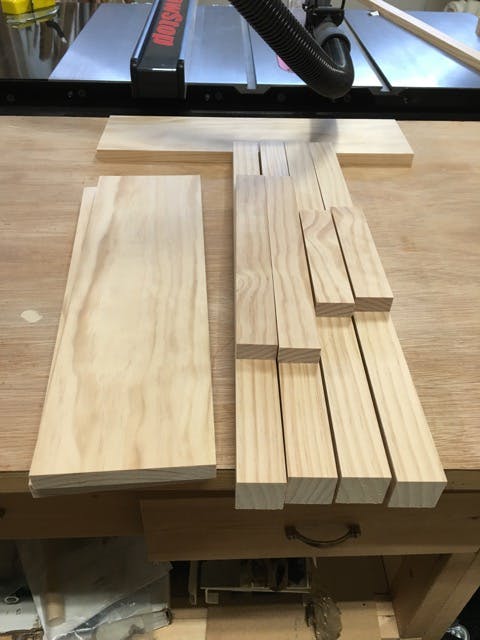
Materials needed:
1 – 2 x 2 @ 8 feet long
1 – 1 x 6 @ 6 feet long
1 – 1 x 2 @ 4 feet long
1¼″ pocket hole screws
wood glue
Equipment needed:
You will need a Kreg Pocket Hole Jig of some kind.
I have the Kreg K5 (which I don't think they make any more), it is a great piece of kit, but if you don't want to spend the money, they do smaller models all the way down to the Kreg Mini Jig.
Plan:
Cut the pieces to size as follows:
2 – 1×6 @ 18½″ (the extra ½″ will be trimmed off after glueing)
2 – 1×6 @ 16″ (the extra ½″ will be trimmed off after glueing)
4 – 2×2 @ 23¼″
2 – 1×2 @ 14″
2 – 1×2 @ 7″
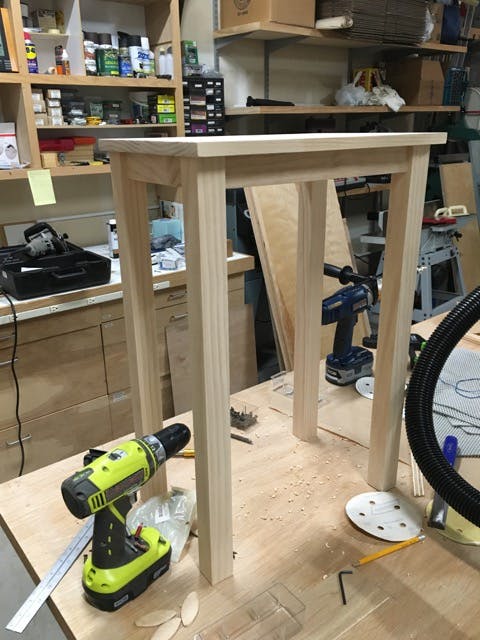
The Top and the Shelf
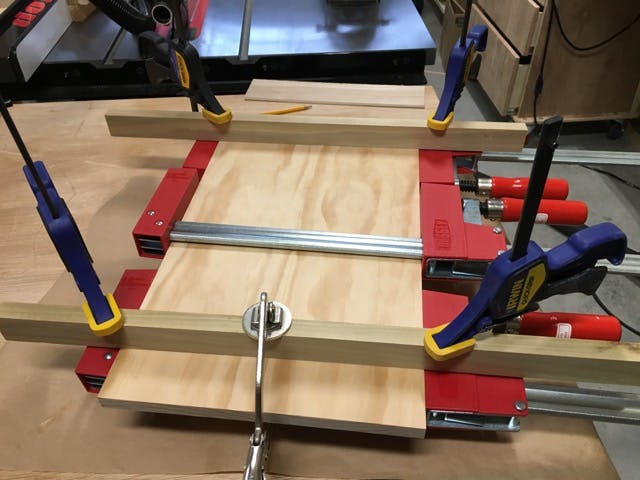
After cutting the pieces to size run the edges of the four 1×6 pieces through a jointer if you have one to square up the edges. you will be gluing each pair together to make the top and the shelf, so make sure that you pick which sides you want facing up. The ideal choice will be to have the grain alternating between the two pieces (one face up and one face down) to minimize expansion and contraction of the top.

Once you have chosen which pieces you want where, put some glue along one edge of each board and clamp them together. If you have a biscuit joiner you can put biscuits between them to keep them level. I did this for the top but not for the shelf, and honestly given the small size of the pieces, I don't think they were necessary.
Once the glue has dried, trim ¼″ off each of the edges of the larger piece to make the final size of 11″ x 18″. This will ensure that the ends are clean.
Do the same with the smaller piece but you will also need to trim the sides to get to the final dimension of 8½″ x 15½″
The frame:
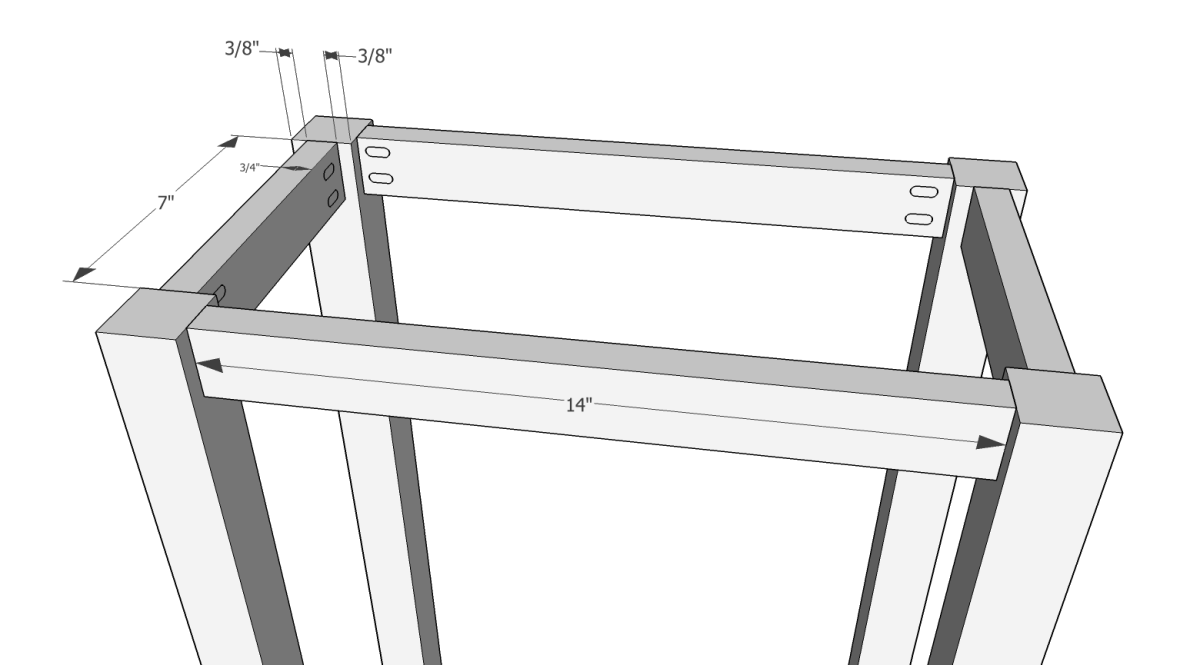
Now while the glue is drying it is time to start assembling the frame. Each of the cross pieces is centered on corner piece it attaches to and aligned flush with the top.
Drill pocket hole screws on each end of all four of the frame pieces and screw them into the legs as show in the picture above. Make sure to keep the frame square.
Attaching the Top:
Drill holes vertically through each of the longer side pieces as shown below using the pocket hole drill bit. Make sure that you stop the drill as it breaks the surface. That will give you a countersunk hole along with a predrilled bore through to the top.
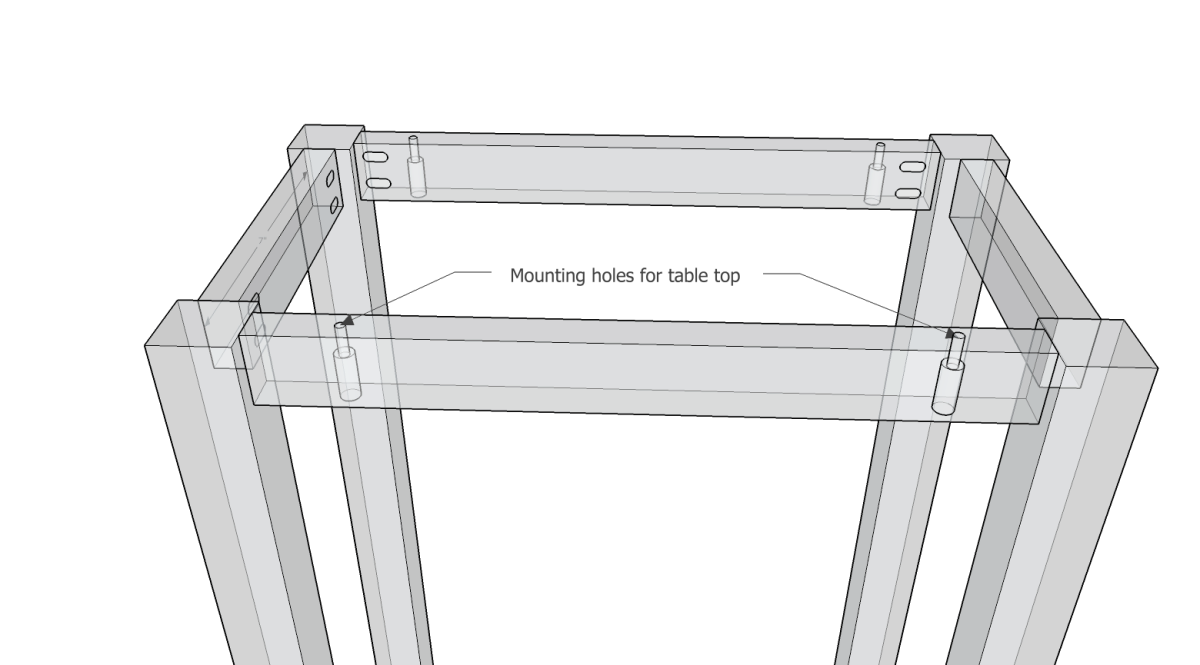
Now center the top on the frame and screw it on.
The Shelf:
Now for the shelf. To fix the shelf to the legs there are a coupe of things we need to do. First we need to cut 3/4″ x 3/4″ notches out of each corner of the shelf. Then we need to drill pocket screw holes in each corner of the shelf. This is how we attach the shelf to the legs.
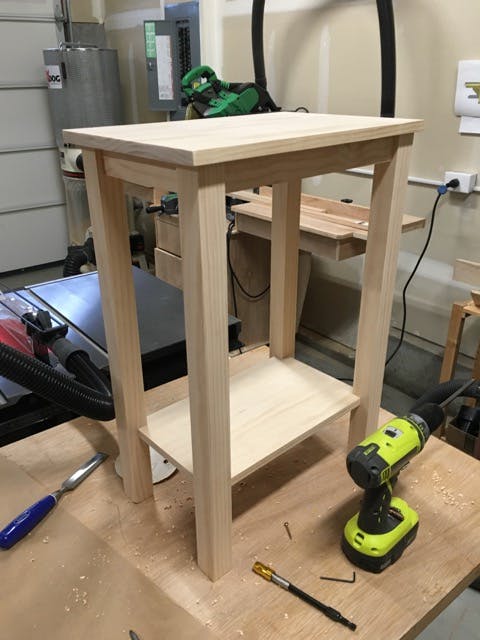
Now you can stain it whatever color you wish. Personally I chose an ebony stain to make it look like the rest of the furniture I have from IKEA.

Enjoy…
October 18, 2015 (11y ago)